The quest to find a new camera bag for long hikes – part 1
This was mainly meant for documentation purpose for myself, if anybody reads this and finds it helpful let me know, I’d be happy to hear about it 😉
My approach
On daytrips (e.g. hiking, visiting cities) I’m already using my trustworthy Lowepro 400AW, it’s big and sturdy enough for rough treatment. Recently there have been very exciting offerings by f-stop and MindShift (by Think Tank) which use a very similar concept of accessing your backpack from the back side while it is in front of yourself and not on the ground. I might look into those sometime later, however this blog post is dedicated to my approach for long distance trips or hikes with overnight stays.
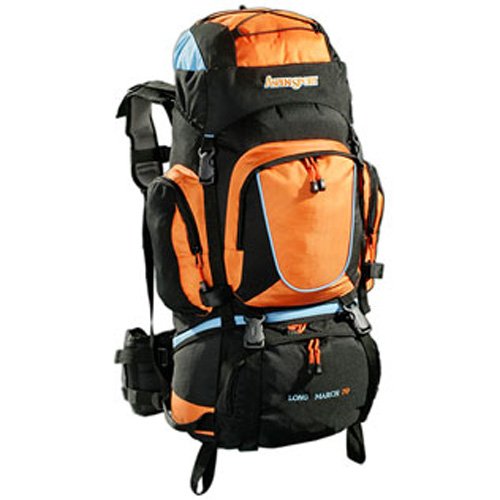

I previously just combined what I had at my disposal, a cheap 70L trekking backpack by Aspensport and an Olympus E-System shoulder bag. I never even tried to fit my camera equipment directly into my trekking backpack, like putting it into a dedicated compartment with clothes for padding, I always liked the idea of having an ICU (internal camera unit) where I can arrange my camera gear properly, it’ll stay in place and it’s perfectly protected from outer impacts. So in this case I just used the shoulder bag as an ICU while keeping the shoulder strap attached, because I want to be able to just pull it out of the backpack and use the comfortable access to my equipment from the top while it hangs in front of me.
Recently both trekking backpack and camera shoulder bag became almost unusable because of some serious wear, I even stitched together seams which already disintegrated. Well, this was the motivation to look for new equipment for the job and hence this blog post, it was mainly meant for documentation purpose for myself 😉
Trekking backpacks
I considered the following requirements:
- Around 70L of interior volume
- Comfortable carry system which makes you carry most of the weight on the hips (my previous Aspensport trekking backpack was really bad at this!)
- Many reasonably placed pockets to store different equipment, also wet pocket
- Enough and well placed mounting possibilities for hiking poles, camping kitchen equipment, tent, tripod etc.
- Hydration system (compatible to 3L hydration bladders)
Unfortunately I didn’t do much research on the trekking backpacks. I have known the fabulous f-stop mountain series (e.g. Sukha and Shinn) for quite a while now, but there is on thing which kept me from buying one: availability. Here in Germany a friend of mine had to wait almost 2 months to get one after ordering. Their ICU concept is very nice, however not flexible enough (yet) for me, I want an ICU which can be used as a proper shoulder bag too. This means I want to able to conveniently pull out and put back my camera while standing. I think by offering shoulder straps for their ICUs f-stop might be already on the way to offer something which would be perfect for me, I’m curious and will stay tuned with what they come up with in the future!
During my recent research the Deuter Aircontact Pro 70+15 was one of my first finds and immediately became my first choice, it ticked off all of those requirements, received good reviews and also I trust the good reputation of Deuter among alpinists and mountaineers as a very experienced company with high-quality equipment.
Shoulder bags
Now this was the main part of my research. There are so many shoulder bags on the market, it was really difficult to get a good overview in a short amount of time. For comparison:
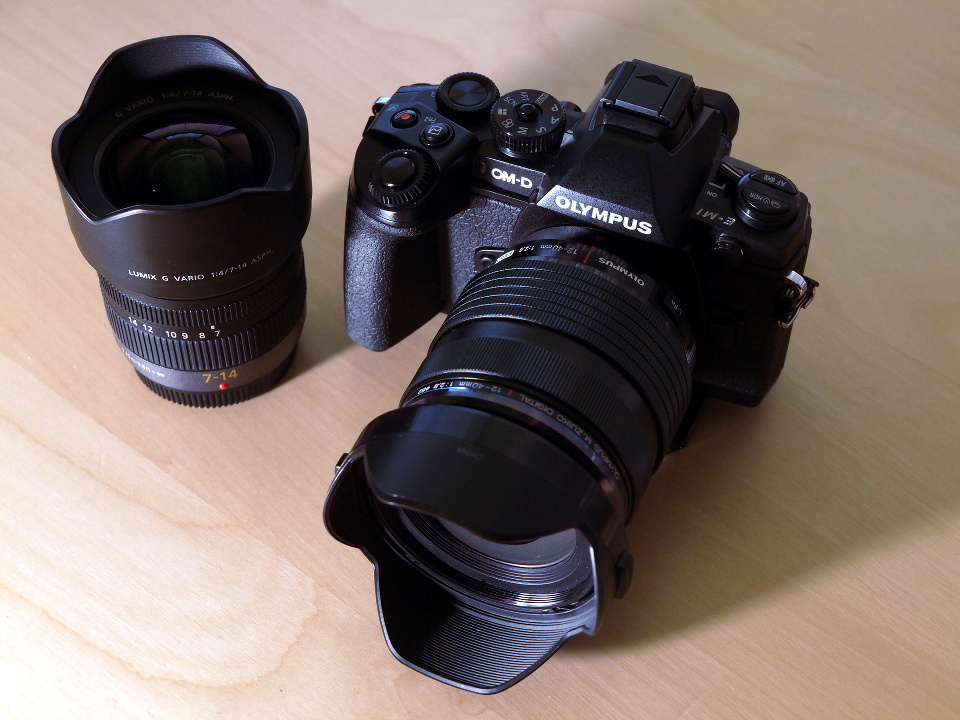
- My old Olympus E-System II shoulder bag (E0413361)
- Exterior dimensions (L x W x H): 28 x 16 x 21 cm
- Interior dimensions (L x W x H): 25,5 x 12 x 18cm
- Weight: 590 g
And here are the new shoulder bags I considered:
- AmazonBasics DSLR bag (big)
- Exterior dimensions (L x W x H): 30,5 x 17,8 x 22,9 cm
- Interior dimensions (L x W x H): 25,4 x 12,7 x 17,8 cm
- Weight: 726 g
- Thoughts:
- nice overall design and cheap
- can put my Olympus E-M1 crossways into the bag, with the lens facing downwards
- compartment for tablets, suitable for filters
- even offers functionality to mount small tripods
- but on the big and heavy side
- AmazonBasics DSLR bag (medium)
- Exterior dimensions (L x W x H): 29,5 x 12,5 x 20,0 cm
- Interior dimensions (L x W x H): 26,0 x 9,5 x 17,5 cm
- Weight: 448 g
- Thoughts:
- also nice overall design like the big bag
- compartment for tablets, suitable for filters
- a little bit too narrow for big lenses, or bigger equipment
- Lowepro Adventura 170
- Exterior dimensions (L x W x H):: 25,5 x 19 x 25 cm
- Interior dimensions (L x W x H): 22 x 12,5 x 19,5 cm
- Weight: 400 g
- Thoughts:
- nice design and lightweight, but way too deep / high
- reasonably cheap because it’s a phase-out model, version 2 is already available (see Lowepro Adventura SH 160 II below)
- can put my Olympus E-M1 crossways into the bag, with the lens facing downwards
- no compartment suitable for filters but front pocket should be big enough to carry filters
- Exterior dimensions (L x W x H):: 25,5 x 19 x 25 cm
- Lowepro Adventura SH 160 II
- Exterior dimensions (L x W x H): 23.5 x 15.6 x 18.2 cm
- Interior dimensions (L x W x H): 20.3 x 14.6 x 16.2 cm
- Weight: 400 g
- Thoughs:
- very similar to Lowepro Adventura 170 but more expensive and worse volume / weight value
- however has no compartment suitable for filters, even front pocket layout very volume inefficient
- OP/TECH USA 11″ Accessory Pack
- Exterior Dimensions (L x W x H): 27.9 x 20.3 x 6.4 cm
- Weight: 272g
- Thoughts:
- very nice and lightweight ICU like pack
- comes with strap mounts and even a shoulder strap
- also available in other sizes
- but missing the comfortable access from top compared to usual shoulder bags, can only be accessed by the side while wearing it, I’m scared that equipment might fall out of the bag :/
- Inca Sapa DSLR shoulder bag
- Exterior dimensions: N/A
- Interior dimensions (L x W x H): 27 x 21 x 11 cm
- Weight: N/A
- Thoughts:
- bendable padding goes around lens compartments (left/right), camera can be put on top of lens compartments, has zipper access on both sides, this is all stuff I got used to with my previous Olympus E-system bag, I worked quite well in comparison to conventional shoulder bags
- put my Olympus E-M1 crossways into the bag, with the lens facing downwards
- compartment for tablets, suitable for filters
- not available in Germany / Europe
- Think Tank Photo Mirrorless Mover 25i
- Exterior dimensions (L x W x H): 28 x 15.5 x 12 cm
- Interior dimensions (L x W x H): 27 x 14 x 10.5 cm
- Weight: 500g
- Thoughts:
- nice overall design and size, but a little bit too long
- very expensive for a simple shoulder bag
- compartment for tablets, suitable for filters
- magnetic closures are a nice idea but I wouildn’t trust them to keep my camera bag closed
- Tamrac 3446 Rally 6
- Exterior dimensions (L x W x H): 36 x 17 x 26 cm
- Interior dimensions (L x W x H): 33 x 12 x 22 cm
- Weight: 709g
- Thoughts:
- bendable padding goes around lens compartments (left/right), camera can be put on top of lens compartments, has zipper access on both sides, this is all stuff I got used to with my previous Olympus E-system bag, it worked quite well in comparison to conventional shoulder bags
- nice overall design but a little bit too big and too heavy for my needs
- compartment for tablets, suitable for filters
- put my Olympus E-M1 into the bag, with the lens facing downwards
- Crumpler JP5500-001 Jackpack 5500
- Exterior dimensions (L x W x H): 35 x 21 x 15 cm
- Interior dimensions (L x W x H): 32 x 20 x 12,5 cm
- Weight: 0,8kg
- Thoughts: TBD
- Mantona ElementsPro 20
- Exterior dimensions (L x W x H): 19 x 24 x 17 cm
- Interior dimensions (L x W x H): 17 x 22 x 15 cm
- Weight: 0,72 kg
- Thoughts: TBD
- Think Tank Speed Demon V2.0
- Exterior dimensions (L x W x H): 30.5 x 21.6 x 20.3 cm
- Interior dimensions (L x W x H): 23.5 x 17.15 x 12.7 cm
- Weight: 1,0kg
- Thoughts: TBD
Final choice / selected bags
Related links
- http://pratapj.in/custom-made-internal-camera-unit
- http://www.mountainphotographer.com/panel-loader-backpacks-for-hiking-photographers
I previously selected the Lowepro Adventura 170 bag as the go-to shoulder bag, but once it arrived I noticed that I highly underestimated the depth / height of the bag, which was ridiculous for my needs, hence I sent it back.
Now I ordered the AmazonBasics DSLR bag (medium) bag because it is very close to my old one in terms of size and at the same time it is very inexpensive compared to the ThinkTank shoulder bag, which I also liked.
I guess I’ll keep updating this post and maybe I’ll post a picture later of how I arrange my gear in those bags.